PRESS START TO BEGIN!
Exhibit A


NOMINATED FOR DCP 2025
BEST PROTOTYPE
WINNER OF GAMES FESTIVAL 2025: BEST FINISHED GAME
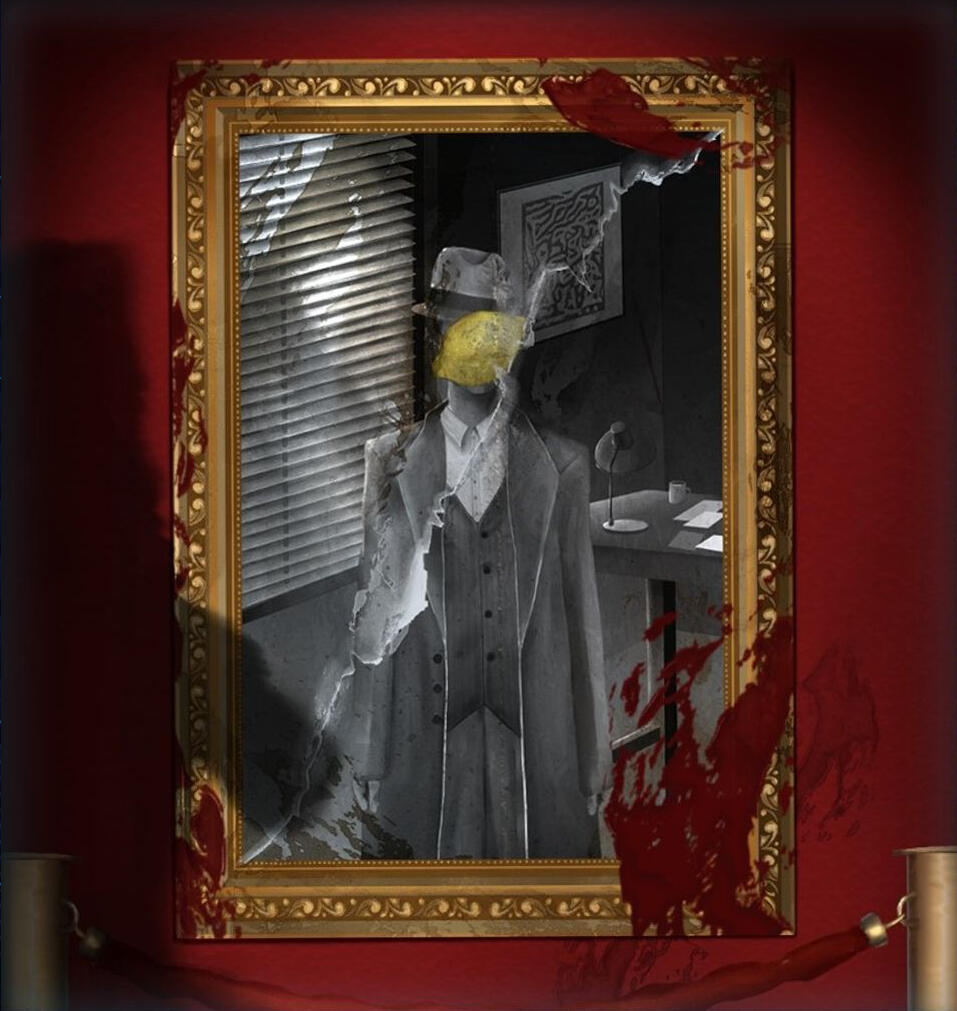
A murdery mystery in a museum where the art pieces come to life.
Interrogate the subjects of art, find out who the suspect is, and let justice prevail - or don't.
(2D Artist)
Post Apocalypse
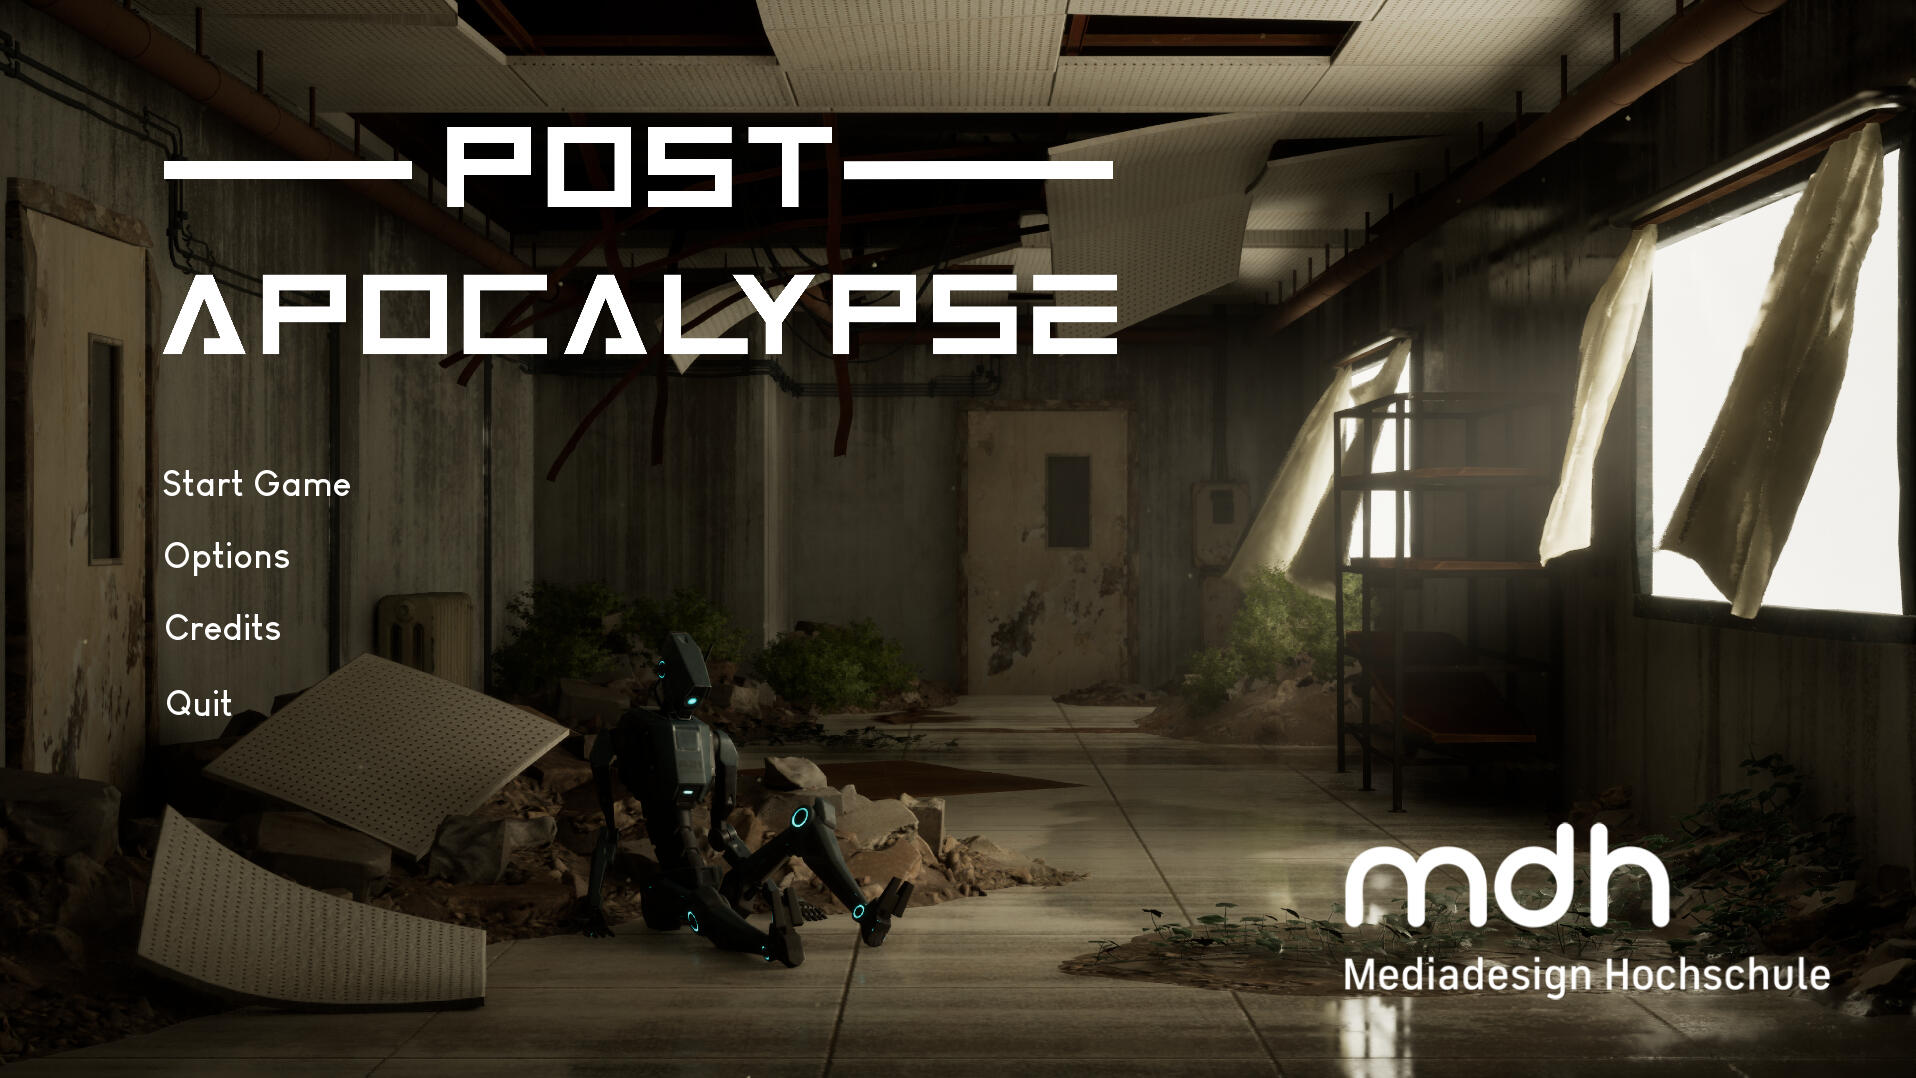
Walking Simulator in an abandoned, post apocalyptic city: You are a mailman robot looking to deliver three last letters in an area where a foreign writing system is used.
(3D Animator, Tech Artist, Lead Programmer)
Biscuit & Bones
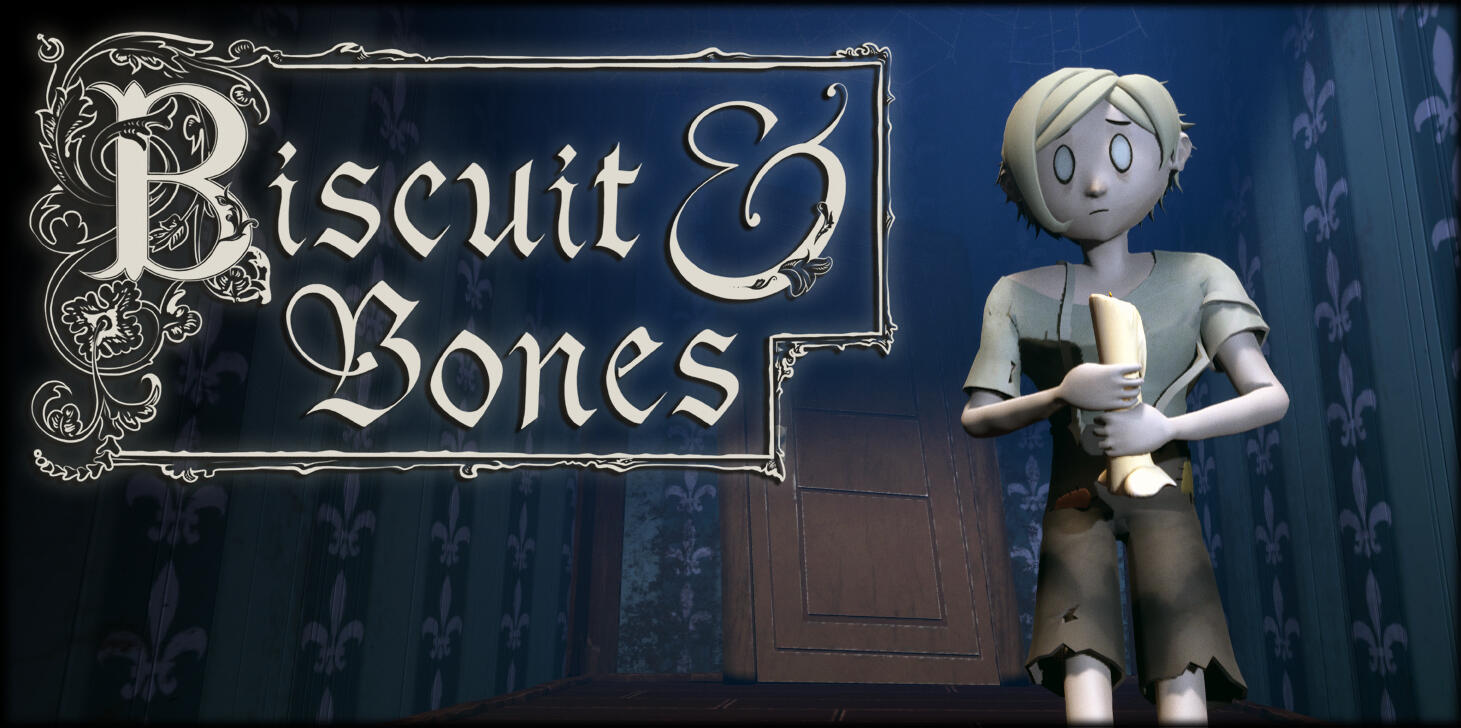
Little Nightmares meets Hansel and Gretel: You are a third child caught by the evil witch. Solve puzzles and hide from dangerous monsters to escape from her lair!
(3D Animator, VFX Artist, Tech Artist)
Vacation Invasion
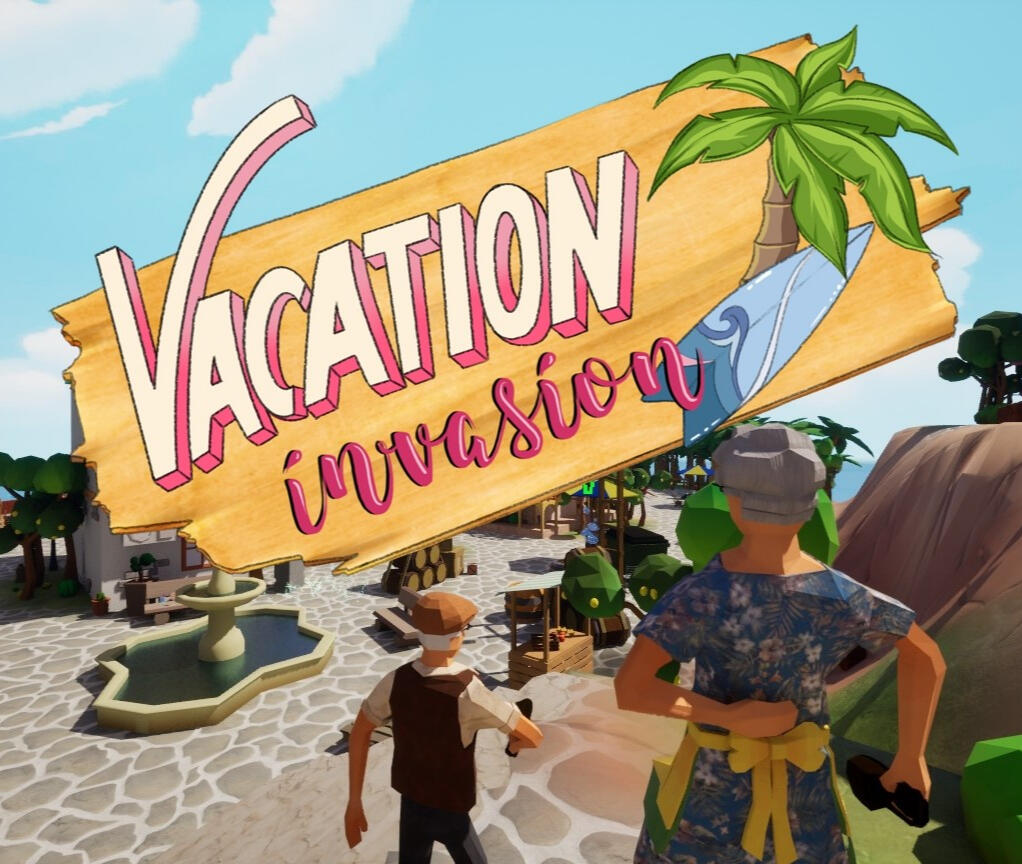
Slip into the role of a local and try to catch the tourists that hide as props on your island, or do you best to escape the locals while blending in with your environment in this Multiplayer Prop Hunt Game!
(Lead Artist, 3D Artist, 3D Animator, VFX Artist, Tech Artist)
Another One Fights The Dust
OVER 10K DOWNLOADS ON ITCH.IO
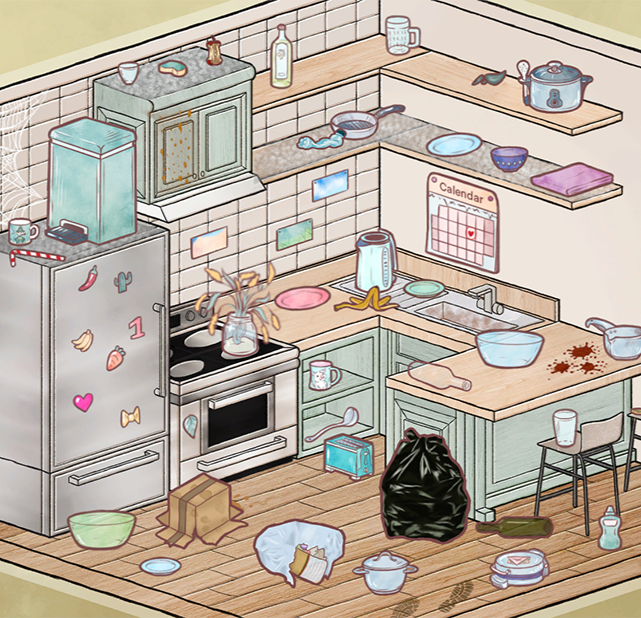
Hate cleaning your room? Procrastinate instead by playing this cozy 2D cleaning game inspired by Unpacking!
(Lead Artist, 2D Artist, 2D Animator)
Bubbler
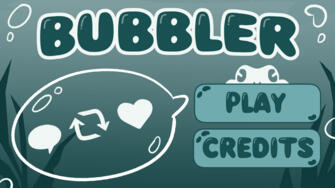
Feed the algorithm by creating social bubbles and assigning the correct hashtags! Made in the Global Game Jam 2025
(2D Artist)
Internship at Wegenbartho Games
What I worked on:
- Creating a short game in under 48 hours
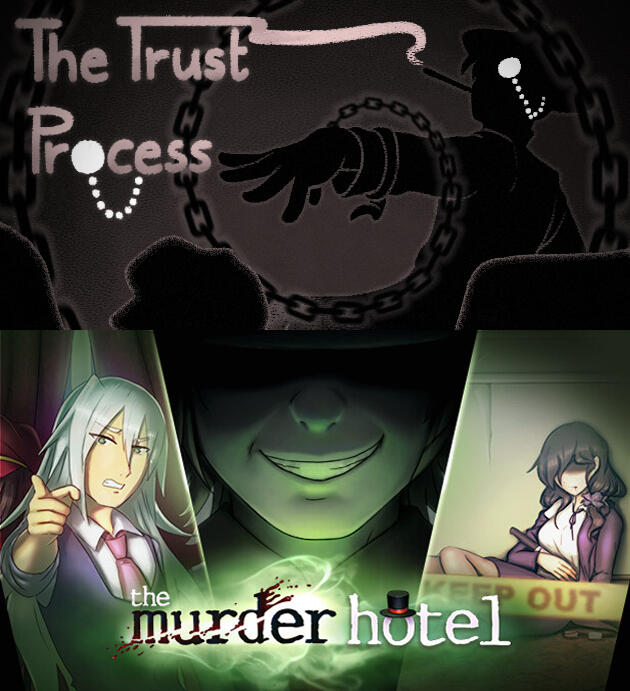
- 2D Art and Concept Art for "The Murder Hotel"
Internship at Temporal Dynamics
What I worked on:
- Technical Art and VFX Art for "Antisuns"
Other University Projects

Concept Art: Atlantopods

Concept Art: Quills Cosmic Cruiser

Concept Art: Norfield

Paper: AI and Games
Hi, I'm Flynn!
When I first played Ocarina of Time, I wasn't just saving Hyrule - I was discovering my interest in how games are made. Since then, it became a wish to actively contribute to the creation of such interactive experiences.
I am almost finished with my Game Design studies at the M.DH in Munich (7th Semester) and I'm always motivated to improve my Game Art Skills!
My Skills / Interests:
3D Animation
I have worked on multiple projects where i was the sole 3D Animator creating character animations and implementing them in the Unreal Engine. I have experience with animation blueprints, state machines and generally the technical setup required for gameplay animation systems. Additionally, i have basic rigging and skinning knowledge to prepare models for animation.
Technical Art
I enjoy implementing technical systems using blueprints. I have implemented in-game audio and music using FMOD banks and Unreal Blueprints, and I am comfortable using timelines to animate. I also created a Control Rig Setup for procedural animation.
2D Art / Concept Art
My biggest strength in the 2D Department is my Versatility and Adaptability. I am able to imitate different art styles based on what is asked of me. I can implement feedback into my creations and work closely with other artists to achieve goals.
VFX Art
I have basic experience creating real-time visual effects using Niagara in Unreal Engine and am familiar with setting up particle systems and implementing them into gameplay.
Unreal Engine
I have solid experience working with the Unreal Engine and Blueprint visual programming to implement gameplay features and mechanics. My experience includes integrating Animation Montages, VFX Systems and a full FMOD audio system. On one project, I also worked among other roles as the lead Programmer, coordinating core gameplay mechanics. I also use the engine for most of my 3D Animation work.
Adobe Photoshop
I use Photoshop for all my 2D Art and Photo Editing, with solid knowledge of the program in order to efficiently create 2D Assets and edit graphics.
Maya
I use Maya for rigging and skinning and formerly for 3D Animation. I have basic knowledge in those parts of the program.
Blender
I am able to create simple models in Blender. I use Substance Painter to texturize it.
Procreate
I use Procreate to create some artworks when I am currently not at my working place.
CV Still in early access!
Exhibit a


(Nominated for DCP 2025:
Best Prototype)
(Winner of Games Festival 2025: Best finished game)
In Exhibit A, a murder mystery in a museum with not-so-normal pieces of art, you find yourself as the detective to solve a case with a current topic: The newest addition, an AI Work, has been sabotaged, and the subject of a painting has been murdered.
You interrogate the other pieces of art that come to life at night, and find out who is responsible. In the end, you decide wether to bring justice for the AI Work and the victim or not.
Me and five other students created the game from November '23 - February '24, with the last six weeks being full-time and the rest being the pre-production.


My position in the team: 2D Artist
My field of work: 2D Art (Traditional and Digital), UI, Screens, Cutscenes
Paintings
I painted half of the paintings in the muesum, many of them traditionally.
It was my goal to imitate different artstyles that have been used throughout history.
Advocatus Diaboli (Acrylic Paint on canvas)
The painting of the devil is intended to be based on the artstyle of the romantic epoch. Our Game Designer and Lead Artist worked closely together to come up with a design for the painting. The viewer should be able to tell from the painting that the devil is a charming, yet shady and manipulative.
The first is the pose our Game Designer chose for him, while our Lead Artist picked the second painting (of Raphael from Baldur's Gate 3) to serve as reference for the color palette.


Then, our Game Designer did a rough sketch of what the painting should look like. I used this and the pose as reference for the detailed sketch I did on photoshop. I decided to let him spread his wings in different directions to better fill out the canvas and also added some floating rocks to fill out the backdrop.


I struggled a bit with finding fitting clothes for the devil, so our Game Designer sent me some references and I used these to design an outfit for him and finish the sketch.


Then I printed out the sketch in the correct size and traced it onto the canvas. I started painting it with acrylic paint, starting with the backdrop and working my way forward. When choosing the colors, I always kept paying attention to the Baldur's Gate 3 painting.


The next step was to bring the painting back to photoshop for editing. I set up the canvas in good lighting and snapped a high-resolution picture of it with my Canon Camera. Then I added details like the flame above his finger and the fire in the bottom. I deliberately chose not to add them traditionally because I was too afraid of making an irreversible mistake. I also edited values like brightness, contrast, ect.

Our Lead Artist gave me the feedback that I had overdone the editing, so I made it more subtle and added an oil paint filter on Photoshop, then the painting was finished!

To make the painting seem even more realistic in the Game, I made a Normal Map of it in Photoshop to create a 3D-Effect. I imported everything into the Unreal Engine, created a material with the textures and added it on top of a plane. Like that, the devil was added to the museum and ready to help the player - or not. (Frame model by our Lead Artist)


Still Life with candle (Digital Painting)
This painting is supposed to look like an old Vanitas Still Life. Since there is a huge amount of detail required to make it look realistic I decided to paint it entirely digitally with Photoshop. Our Game Designer did a quick sketch with the layout and all the items that should be included.


To fill up some more space and make the composition look more whole, I changed the image size and added a few more items commonly found in still life painting, such as the feather, the glasses, the walnut and the hourglass.


Then, I painted the items one by one, colorpicking from original still life paintings.


I actually made two versions of this painting because in the Game, a sword from the Samurai painting is hidden in the Still Life. It was my task to hide it well enough to not be too obvious, but the player should still be able to tell a difference between the weapon and the rest of the painting.
Since the Samurai Painting was made by the other 2D Artist, she sent me the PSD file, and I extracted the sword and put it directly into the still life. I placed it underneath the feather and added shadows from the other objects to make it blend in better.
(From top to bottom: Samurai Painting, Still Life without Sword, Still Life with Sword)


To finish everything, I again created normal maps for both versions and repeated the workflow into the Unreal Engine.


UI DESIGN
I created everything that has to do with the UI with the guidance of our Game Designer and our Lead Artist. We wanted to achieve the look of typical old notebooks that would fit in the museum detective murder mystery setting.
THE JOURNAL
Our Game Designer had the idea that the journal should have different pages you can open and that they should be accessible with bookmarks you can click on. She also showed me some reference pictures and as you can see, she wished for a leathery, crumpled look, the book is supposed to look handmade and used.


First off all, I wanted to try out wether the book should be bound like a typical book or if it should look more like a notebook with rings in the middle. After some discussion with the Team, the second option seemed better.


To get a clearer image of what the journal should look like, I sent my Game Designer two more references to ask her which ring style she would prefer, with her choice being the second one. This then became my main reference for the sketch.


Our Lead Artist gave me the feedback that I should put the "Thesis" bookmark on the left side with "Who" and "Weapon" and he also told me to rotate the "Weapon" bookmark into more of a straight angle. Then it was time to render the base of the journal!

After some brief consideration our Game Designer asked if I could make the leather slightly darker in order for the book to stand out more against the museums red walls. In addition she told me to add a few more pages behind the two open ones to make the journal appear thicker. (to the right the additional pages are not rendered yet, I first wanted to make sure it matches her wish)


When everything was set, I rendered the additional pages and added some little extra items here and there to enhance the journal's "used" look.

Then it was time to draw the bookmarks. Our Lead Artist said the ones on the left side were to small, so I increased their size to make them more readable.


Our Lead Artist also noticed that there was too much free space between the right border of the journal and the border of the screen, so I adjusted the format, so the journal was now perfectly in the middle. And with that, it was finished and ready to be filled!


The Logo
One of my final tasks with Exhibit A was designing and drawing the Logo. It should entail the Genre of the Game without too much clutter. On the left are quick simple sketches by our Game Designer with the magnifying glass one being our favorite. On the right is a Logo I found, our team really liked the artstyle, so I used it as reference as well.


I decided to add our detectives gray hat to give the Logo a more complete look. When my Lead Artist approved of the sketch, i worked out a more detailed one.


Our Game Designer then asked if I could remove the key in the "I" to make the letter more readable and also straighten out the "T". With that, the sketch was finished and I could render it. There were no changes needed after doing so, because the team was happy with it as it was.

What I learned
Using Unreal Engine for the first time
Greatly improved my 2D Art Versatility
Asking for more feedback from the lead positions
Showing more initiative when solving a problem
Better communication with team members that do the same/similar tasks as I do
Post Apocalypse
Post Apocalypse is a 3D Walking Simulator set in an abandoned post apocalyptic city in the future: You play as a mailman robot who has to deliver three last letters. The twist: The residents used a foreign writing system and you have to decipher the addresses on the letters. While exploring the city, you find out its fate.
Me and four other students created the game from November '25 - February '26, with the last six weeks being full-time and the rest being the pre-production.


My position in the team: 3D Animator, Technical Artist, Lead Programmer
My main field of work: 3D Animation, Tech Art, Programming, FMOD Integration
The abandoned Robots (3D Animation)
For environmental storytelling reasons, we have placed several abandoned robots in the city. They all had different former roles / professions. At the time of where the game itself is set, the machines are long abandoned and trapped in simple looping animations that hint at their past functions. They are meant to emphasize the atmosphere of decay in the post-apocalyptic setting. It was my job to animate them in order to fullfill those goals. I will now explain the making of two of them.
The first robot's profession was that of a receptionist in a hospital. It is supposed to stand behind a desk with various stationary items, lists and files. Various activities/poses it should do in the animation included: Looking at items on the desk, pointing at a file and generally convey the impression of keeping an overview of the files.


After creating a modular rig and a Level Sequence in the Unreal Engine, i first put the robot in main Key Poses to get an overview of the timing and length of the animation. Then I concentrated on creating movements between the Key Poses. I focused on a mechanical and robotic effect of the movement. For example I added rebounds after several movements to make it seem as if limbs are snapping into place and also included short downtimes between movements to create an effect of calibration (See images below of a before and after adding rebound).


The following videos include two showcases of the animation (Rotating showcase, and In-Game with sound and music)
The second robot's role was that of a nurse with a kind, caring character trait. It should rotate through different acts of care, such as checking the IV Bag or making friendly gestures toward the supposed patient (even though there are no patients present anymore). I proceeded in the same way as before. The following videos showcase the animation with and without the assets the robot interacts with.
The Player Character (3D Animation, Technical Art)
I fully handled the complete setup of the first-person player character, which included assembling all required components, configuring the camera alignment and positioning and creating and integrating the character's animations and its system.
For the intro sequence of the game, I created a cinematic cutscene using camera fades and first-person-camera movements using timelines. The scene shows the player character booting up, with mechanical movements designed to subtly convey that the character is a robot.
Another animation I created and implemented is triggered when the player interacts with a mailbox that has the wrong address. The sequence was delibaretly made long to discourage the player from trial-and-error behavior while the tap on the letter address guides the player toward the suggestion that the address needs to be translated in order to find the correct mailbox.
Implementation of in-game audio and music (FMOD, Techinal Art)
I was responsible for the full implementation of in-game audio and music. I worked with FMOD banks and predefined parameter setups that I recieved by our Sound Designers. Using Blueprint Scripting, I integrated all audio events into the game.
I created and placed trigger Blueprint Actors to control audio transitions between interior and exterior spaces which allows the atmosphere to chance dynamically depending on the players location.
Additionally, I implemented variating footstep sounds using physical materials which links surface types to the players location and corresponding sound events. The following image shows the blueprint scripting for this.

The lever riddle (Programming, Technical Art)
The lever puzzle was designed around this concept: Five levers are mounted on a wall, and the player can interact with them wo switch each lever between an upper and lower position. Once all levers are set to their correct positions, the door opens and the player can progress.
A detailed breakdown of the implementation can be found unter the following link:
The following video shows gameplay of the lever puzzle in action:
What I learned
Designing animations as gameplay feedback rather than just visuals, using subtle cues to guide player behavior
Integrating FMOD events into games, designing systems that dynamically change audio
Working across multiple disciplines since this was our first project without a real programmer
Biscuit & Bones
Biscuit & Bones is a 3D Horror Puzzle Game inspired by the "Hansel and Gretel" Fairy Tale where a child has to find a way out of the witches hut by solving puzzles and escaping monsters.
Me and six other students created the game from June '25 - August '25, with the last six weeks being full-time and the rest being the pre-production.


My position in the team: 3D Animator, Technical Artist
My main field of work: 3D Animation, Tech Art, VFX Art
The Monster (Tech Art and 3D Animation)
I wrote the Control Rig for the Monster from scratch.
I decided to try out blueprinting procedural animation for the walking animation of the Monster, especially because of its unpredictable pathfinding and in case it has to step over obstacles.
For the first step, I found a tutorial on how to create a control rig for a Spider, and I recreated it.
In order for the control rig to work on our four-legged monster, I had to adjust it in a few ways because, in contrast to a spider whose legs all bend at the same angle, our monster's legs bend in two different angles, as you can see below.

So instead of the control rig looping through each leg as it does for the spider, I rewrote it in a way where it would only loop through the front legs and i duplicated the loop for the back legs while changing the bending direction. Here you can see a prototype of the Monster walking correctly.
After rigging and skinning the final model of the monster, I retargeted the control rig and made some adjustments in order to make the walking animation look better.
For example, I added a function that bends the spine of the monster if it stands on a ledge or goes up stairs. Below you can see a video without that function and then with it.
In order to have a better overview of the sheer size of the control rig, here is a video of me going through the entire thing.
I also hand-animated the movements of the monsters neck and created the Animation Blueprint with a State Machine that makes sure to play the correct neck animations on top of the control rig based on wether the monster is idle, has spotted or is chasing the player. The state machine also overrides the control rig with a unique animation if the player is caught.
Below is a video of the monster with the finished animations and one with it in action in the final version of the game.
The Main Character (3D Animation and Tech Art)
In order to bring the Protagonist, our child, to life, I first recieved the finished model and skinned it in Maya. Next, I created a modular rig in the Unreal Engine by placing the correct Module Assets on the correlating joints.
I made all of the animations by creating a Level Sequence and baking it as an Animation Sequence.

When animating the child, I wanted to make sure that it conveys a very frightened emotion and intends to stay as quiet as possible. I started the walking animation by placing them in a pose that is typically percieved as scared (feet that are turned inwards, hunched posture, arms and hands close to the body).

With this approach I animated all of the childs animations.
In order for the animations to play correctly, I also created the Animation Blueprint with a State Machine. Since Biscuit & Bones runs with tank controls, the approach to the state machine was a little more complicated. The child also had the ability to push, pull and pick up objects which all had to be added to the state machine.

The Animation Blueprint tracked variables such as Speed and Rotation Value.

A part of the AnimBlueprint task was also the development of a State Machine. It was in charge of playing the correct animation at the correct moment. I had to tinker around with variables and values in order to get everything correct.

Sequence: Start of Level 4 (Tech art & VFX Art)
The Sequence you can see in the Video below was created by me.
First I'll describe the process of the creating of the VFX that plays when the potion is dropped.
For the smoke I modeled a simple deformed sphere in blender and added a material with a color-changing parameter. Then i added the bubble VFX that I already created before for the cauldron.
Additionally I added a Sprite with a Panner Node that gives the illusion of a flash.
After some more tweaks and additions the Niagara was finished.
Next, I needed to write a blueprint sequence that made sure everything works as intended.
I added a function that let the potion rotate in a certain direction depending of the direction that the box is being moved in. As soon as the box has reached a certain location, a timeline plays that lets the potion fall down, explode and spawn a puddle in its place.


After these events, the leaves should also all burn up, so I added everything needed as well.
What I learned
Greatly improved my blueprinting skills in the Unreal Engine, especially with Techical Art and Techinal Animation, but also with general programming
Greatly improved my 3D Animation skills
Learned to 3D-animate in the Unreal Engine
Improved my Unreal Engine Niagara VFX skills
Vacation Invasion
Vacation Invasion is a 3D Multiplayer Prop Hunt Game where the locals try to catch the tourists, who disguise themselves as props to blend in with the environment.
Me and six other students created the game from June '24 - August '24, with the last six weeks being full-time and the rest being the pre-production.


My position in the team: Lead Artist
My main field of work: 3D Animation, Tech Art, VFX Art
What I also did: Concept Art, 3D Modeling and Texturing, Environent Art
The Locals
I created the locals aka the seekers from scratch and everything that goes with them.
The first design was made by our 2D Artist, and while it looked cute, it did not fit the overall more goofy tone of the game. He asked me if I could do the concept art for them, so I made it my task.

Since Vacation Invasion is more of a fun party game that doesn't take itself too seriously, it was my goal to make the locals seem like stereotypical angry old people. Since the game is low poly, I wanted to make them easy to model with fewer polygons.

I will now explain the modeling and texturing progress. Since the pipeline was the same for both, I will only talk about the male local here.
Starting out, I first modeled the body and then added clothing and details such as the face.


I encountered some issues with the UV Unwrapping, but after manually creating seams, everything went well.


I imported everything needed for texturing into Adobe Substance Painter and first gave him the base colors. After the approval of our Producer, I added some gradients, textures and different values.


It was now time to rig and skin the character in Maya. I manually created a skeleton and skinned it to the model. There were problems to be solved with the weight painting (e.g. the side of the leg moving with the arm, as seen in the video), so I fixed them by hand painting the skin weights until everything was fine.


When it came to creating animations, I wanted to emphasize the funniness of the character by letting them move accordingly. In order to do so, I first looked at some reference material from other games. In the end I settled for the player sprinting animation from "Lethal Company". So I hopped onto the game with a friend and recorded them running from one side to the other.

This video was my main reference for the running animation. At this point I had also added a slipper to the character, his weapon to hunt down tourists.
The next step was to import the character into the Unreal Engine 5. I added the skeletal mesh, the textures and all animations.
As the Tech Artist, it was also my task to correctly implement the animations into the game. So I created a blendspace for the running animation.
I created an Animation Blueprint with the neccessary blueprint. E.g. the "Layered Blend per Node"-Node is there to correctly play the shooting animation in the upper body while the legs still play the running, jumping, falling or idle animation.

A part of the AnimBlueprint task was also the development of a State Machine. It was in charge of playing the correct animation at the correct moment. I had to tinker around with variables and values in order to get everything correct.

The following video contains three animations I created in maya, recorded in the Unreal Engine.
VFX Art (Example: Switch VFX)
Given the game's more cartoony artstyle I wanted to keep the VFX Effects that way as well. I was looking for some inspiration when I though of the little stylized clouds in "The Legend of Zelda: The Wind Waker". I decided that this is the look I should go for with this VFX effect.
So i painted a cloud in this style in Photoshop, the colours do look like that in order to correctly be identified when creating the material, the colours can easily be changed in the Engine.


When creating the Material, I followed a tutorial that helped me to turn the black invisible and the red, purple and cyan into three different changeable colours.

With that finished, I created a Niagara with a SimpleBurstSprite Emitter. There I played around with different values until I got the "Poof" Effect I wanted.
The last thing needed was to implement the VFX Effect into the game. It is supposed to appear once at the hiders location when they switch their prop. So I went into the hider's blueprint and added a few nodes for the effect to correcly play when the prop switching happens.

Modeling: Building
To add inaccessible borders to the maps, we decided to design 6 different houses and freely arrange them in different orders to make the maps seem more lively. We wanted to create the look of typical southern towns with narrow, high houses.


It was the task of one of our artists to draw the concept art for the six different buildings, and when that was done, we evenly distributed the buildings so each artist would be able to model at least one building. As the Lead Artist, I also had to make sure that the houses would have different looks but still belong together. I chose to model the house with the yellow elements.


First though, it was my job as the Lead Artist to ensure that all the buildings share the same dimensions while still adding some variance. So i created a "Cheat Sheet" where I established the correct sizes that should be used when creating the model. This made it easier to add the buildings to the levels without having to scale them.

One of our Artists finished modeling and texturing her building first, and since it fit the style we were going for perfectly, I used it as reference to model my own building as well as telling the other artists to use it as well.
With that and the Cheat Sheet in mind, I started modeling my own building. (Building of our artist to the left, my own model to the right, and the wireframe view below)


When adding the chiseled stone texture to some elements of the house, I found a fitting tutorial on geometry and followed it, then I made my own adjustments until I was happy with the results.

Then it was time to add the model to substance painter. I colorpicked the colors from the concept art and added grunge textures and gradients. In the end, I imported it into the Unreal Engine where it was used for the borders of the map alongside the other houses.


What I learned
Niagaras and Materials in the Unreal Engine
Blueprinting in the Unreal Engine, especially with Animation Blueprints and general Tech Art
Improved my modeling abilities
Being clearer about the art direction as the Lead Artist
Not being afraid to talk about it if assets need to be changed after they are initially finished
Checking even more if an asset is in tune with the art direction before approving of it
Keeping a good balance between being chill and nice & being honest and truthful with your opinions
Another one fights the dust
Hate cleaning your room? Procrastinate instead and play this cozy drag&drop cleaning game!


Me and four other students created the game from June '23 - August '23, with the last six weeks being full-time and the rest being the pre-production.
My position in the team: Lead Artist
My main field of work: 2D Art, Concept Art, UI, 2D Animation
The Rooms
Since the Game has three rooms to clean, it was my task to draw the three empty rooms for the other artists to fill with objects. First, our Game Designer provided me with screenshots of rooms she created in "The Sims 4". I used these as reference to create a sketch of the room, while using a grid to keep the perspective on point.


When doing the Lineart, it looked a little flat to me, which is why I decided to add a thicker outline around the different furniture pieces to let them stand out more.


When it came down to do the flat colors for the bathroom, I decided to go with a color palette that looks a little desaturated. This is because that makes the interactable objects, that are often colored more noticable, pop better.

After adding some shading and highlighting I noticed that the room still lacks liveliness. I then decided to add different textures to the different surfaces. E.g. I would create a layer for the wooden furniture and download a wooden texture photo. Then I would change the layer style to overlay, tweak its opacity and then the bathroom looked more stylized and finished.


To prepare the room for the other artists, I made the grid visible again, but only where objects should be able to be placed. That way, the artists could download the file and draw the objects in the correct size directly into the room.

The Credits Screen
When making the credits, we wanted to implement something cute and cozy, fitting the game's style. Our Game Designer had the idea that our names could be integrated into an open closet, so the player spends some time looking at all the names in a pleasant way instead of having to read a simple slideshow of names


Then I added the lineart and flat colors in the same style as the rooms themselves. I also put the names where they belong.


After finishing the drawing, I had the idea to add a few simple animations on after effects. I created the different frames (for the spider) and the assets that are going to be animated and imported everything to after effects. There, I worked with keyframes to animate the screen.
What I learned
This was the first game I ever created and also my first time working with a game engine, so I encountered a lot of problems I was able to learn from.
Improved my 2D Art skills
More communication with the artists as Art Lead
Staying in very frequent contact with our programmer/s to better implement assets
Learning about what you need to do BEFORE starting to work on it
It's okay to ask for help
Bubbler
In this Drag&Drop Game you are simulating a social media algorithm. You combine "tweets" in a "bubble" and assign it the correct hashtag. Your goal is to keep going for as long as possible before you run out of time! (Credits screen by me)


I was a part of a team of six when we created this game in about 48 hours as part of the Global Game Jam 2025; Theme: Bubbles
My role: 2D Artist
The Tweets
When creating the "tweets", I just screenshots from real Twitter/X Tweets and used these as reference for the layout.


After discussing it with the team, we decided to remove the icons on the bottom and make the keyword of every tweet fat and slightly bigger so players would be able to read them faster.

I also decided to add some inner shadow and a noise filter to the background for a more polished look. When the design was set, I created over 120 tweets just like this.

Animation
Additionally, I also did the animation of the bubble respawning after getting popped. I used a cartoon animation as reference.
What I learned
Improved my speed at creating assets
This was my first ever Game Jam, so I learned a lot about keeping a low scope and rather having a finished, polished, small game instead of an ambitionous idea but not being able to finish it
Improved communication within the team
Game Jams are a lot of fun!
Internship at Wegenbartho Games
October '24 - November '24 (2 Months)
The Murder Hotel
Murder Mystery meets Ace Attorney and Visual novel with supernatural elements and german literature references. The Finnish pilot Ilmarinen Halla is trapped in the Hotel Fafnir, which is isolated by a snowstorm. Now he is forced to solve the crimes that are happening in the hotel.


concept Art: Creating the Character Spalanzani
The world of "The Murder Hotel" is inhabited by being called "Dream Demons". Those take humanoid forms and every one of them is a direct reference to a known character from german literature. For example, we have the demon "Bahnwärter Thiel", who is a cat-humamoid-like creature riding a train.
One of my tasks was to design the dream demon "Spalanzani", who references Professor Spalanzani from "Der Sandmann" by E.T.A. Hoffmann.
Since Professor Spalanzani as we know him in the book is the one who created the doll Olympia, my internship provider wanted to make him a dollmaker. He should wear an apron with different tools and he had the idea of incorporating a smithing furnace to his design.


The first sketch was and old one made by a former artist on the team, while the second one was my first design of him. After some feedback, which included the wish to make him appear less human and adding the furnace and clocks, I designed the third sketch, which became the final design. I gave him special goggles and four arms to enhance his profession as a tinkerer and replaced his body with steel. The fourth picture is his official artwork made by another artist.
2D Animation: Creating the white bunny
In the game, there is one section where the player has to follow a white bunny, just like in Alice in Wonderland. It was my task to create a spritesheet for the bunny with idle and running animations in all four directions.


The pixel art on the left is from one of Wegenbartho Games' older games, and he wanted me to use this for reference.
2D Art: Creating assets in the games art style
When the player inspects something, there is a pop-up with a closeup of the item or the scene. One of my tasks was to create such assets while sticking to the games' art style.
The following pictures show a few examples with the first, third and fifth one used as reference for the art style and the second, fourth and sixth one created by me.


2D Art: Designing Book covers for Assets
Since the game references german literature a lot, I also had to design three covers of well known german books: Die Verwandlung and Der Process by Franz Kafka and Der Zauberberg by Thomas Mann. I wanted to design the covers in different art styles and needed to make sure the viewer would be able to assign the correct cover to the book's name.


"Die Verwandlung"; third one by me


"Der Process"; third one by me


"Der Zauberberg"; third one by me (tasked to add one of the Dream Demons)
Game Jam: The Trust Process
Run as much as you want, you can't escape from the law.The Trust Process is a little Gamejam project made by Wegenbartho and me.Your goal is to escape the abyss by collecting keys and upgrades in this little Metroidvania survival game. But beware, the Dream Demon Process is relentlessly after you.


I was the only artist for this project, so I made every asset and animation while Wegenbartho took care of implementing them and programming the game.
My main inspiration for the art style was the Game "Limbo". Giving the characters and assets black silhouettes made it easier to finish the project on time without loss of quality. The following videos include animations I made for the game.


What I learned at wegenbartho Games
Greatly improved my 2D Artstyle Versatility, being able to imitate different art styles
First time making spritesheets with low-frame animations
Improved my concept art skills
Internship at Temporal Dynamics
December '24 - March '24 (4 Months)
Antisuns
Antisuns is a tactical RPG set in the far future. Command your crew in turn-based combat across multiple spaceships. See enemy moves ahead of time, and come up with the perfect response. Push your luck for greater rewards. If you fail, go back in time, for another randomly-generated run.


VFX Art: The Warp Effect
Since I wanted to learn more about VFX Art, I had the task of creating a Niagara warp effect that played every time the ship would appear or dissappear. That itself turned out to be quite difficult since you usually create warping effects with post-processing materials, but it needed to be a Niagara. Still, I did as much as possible to recreate the effect from the reference video.


The first video is the reference video, while the next two ones are the materials I created. Combined together and with a black sphere they created the finished Niagara effect.
Rigging and Skinning of the Characters
It was also my task to rig and skin the modeled characters to the Unreal Engine 5 Manny Skeleton. In order to do that I imported the mesh of the character and the Skeleton to Maya. Then I made sure that the Skeleton matches the Pose of the Mesh before letting Maya skin it.

Then I had to manually adjust the weight painting in order for the Rig to work correctly. For that I made sure to use the weight painting of the UE5 Mannequin as reference. (UE5 Mannequin on the left side, my own rig on the right side)


Creating a Control Rig
In order to correctly practice rigging and after encouragement of my internship providers, I created a control rig manually for an existing character. I downloaded an available mesh of the character "Candyman" from "Lethal League Blaze" and created the skeleton and control rig from scratch.


On the left is a rig I used as reference, and on the right is my own rig.
This is a small idle animation I made with the finished rig.

What I also tried doing was a hand control rig that opens and closes the hand entirely.

What I learned at Temporal Dynamics
Improved my knowledge of Materials and Niagaras in Unreal Engine 5
Learned the basics of creating control rigs and practiced my rigging and skinning skills
Learned how to handle issues you encounter along the way without having a direct contact who can help (There was no employed 3D Artist on the team)
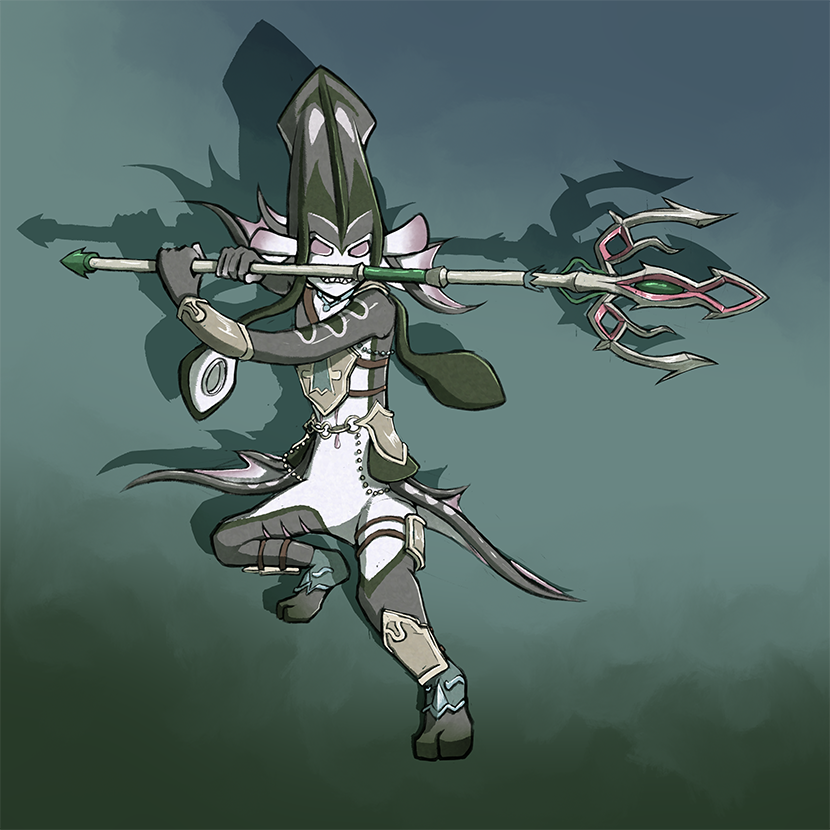
Concept Art: Atlantopods
In this assignment I had to combine an animal of my choice with a human and create our own species. I chose the squid, one of my favorite animals.
Grade: 1,0 / A+


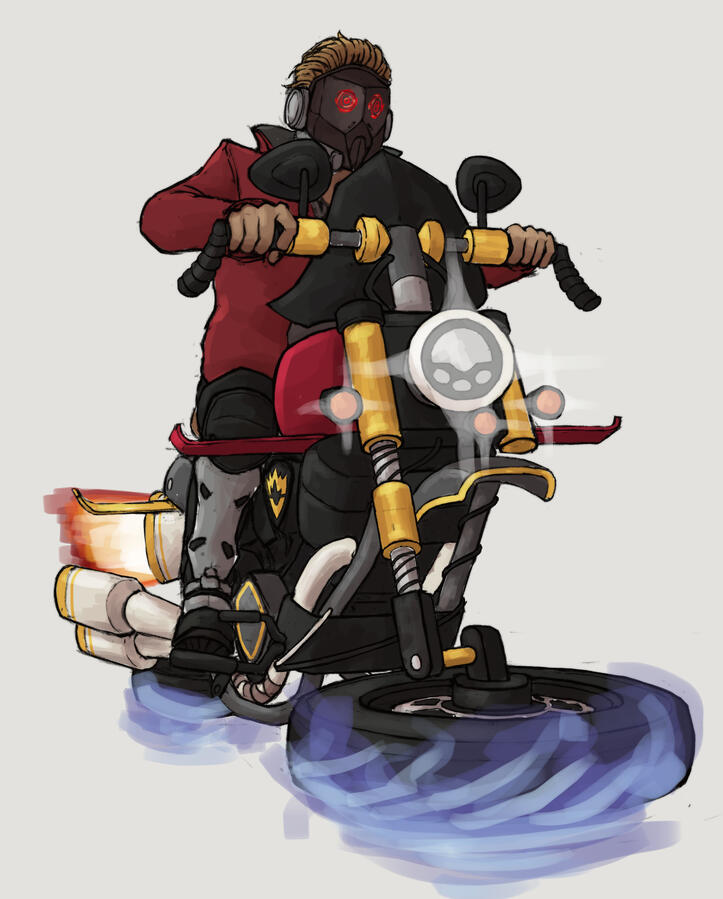
Concept Art: Quill's Cosmic Cruiser
In this assignment I designed a vehicle of my choice and draw it from different angles. It was my task to create concept art in a way that makes the vehicle believable and usable for a 3D Artist. For this I chose to design a motorcycle for Peter Quill aka Star-Lord from Guardians of the Galaxy.
Grade: 1,0 / A+


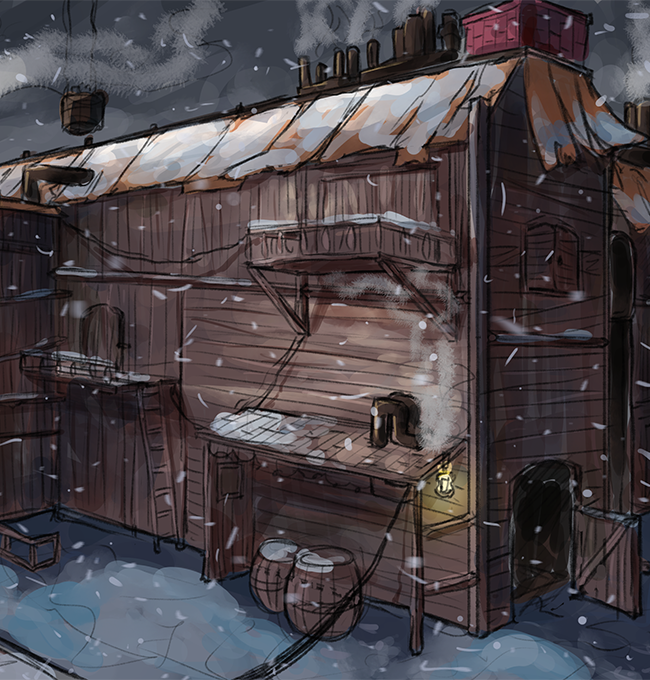
Concept Art: Norfield
In this assignment I had to design an Environment of my choice and draw it from different angles. I also had to explain how my environment works. For this I chose a Frostpunk-inspired village.
Grade: 1,3 / A


Personal Artworks
WElcome Home Tarot Cards (Slide Show)
(May take a few seconds to load properly!)
Those are fanart drawings of the characters from the Horror Project "Welcome Home" by ClownShapedCoffin. I carefully chose one tarot card for each character, the meaning of the card fitting the character, and adding elements you find on each of the original cards. (On the left is the original card, on the right my work)
Artwork Progresses:
"Outlast Trials Poster" and "Viago the Imperial Agent"


Here you can check out the progress of my two biggest pieces!
Sketches: What we do in the Shadows
The following sketches were a practice to draw characters very expressive without being overly complicated. (Characters: Guillermo, Nandor and Laszlo from "What We Do In The Shadows")


Other Works
I use many different art styles to keep my abilities as versatile and adaptable as possible.
(If you wish to take a look at a specific one with higher resolution, right-click it and select the option to view it in a new tab)


Artwork Progress: Outlast Trials Poster
Programs used: Adobe Photoshop (Compositioning, Effects, Textures, Typography), Procreate (Sketch, Lineart, Shading)
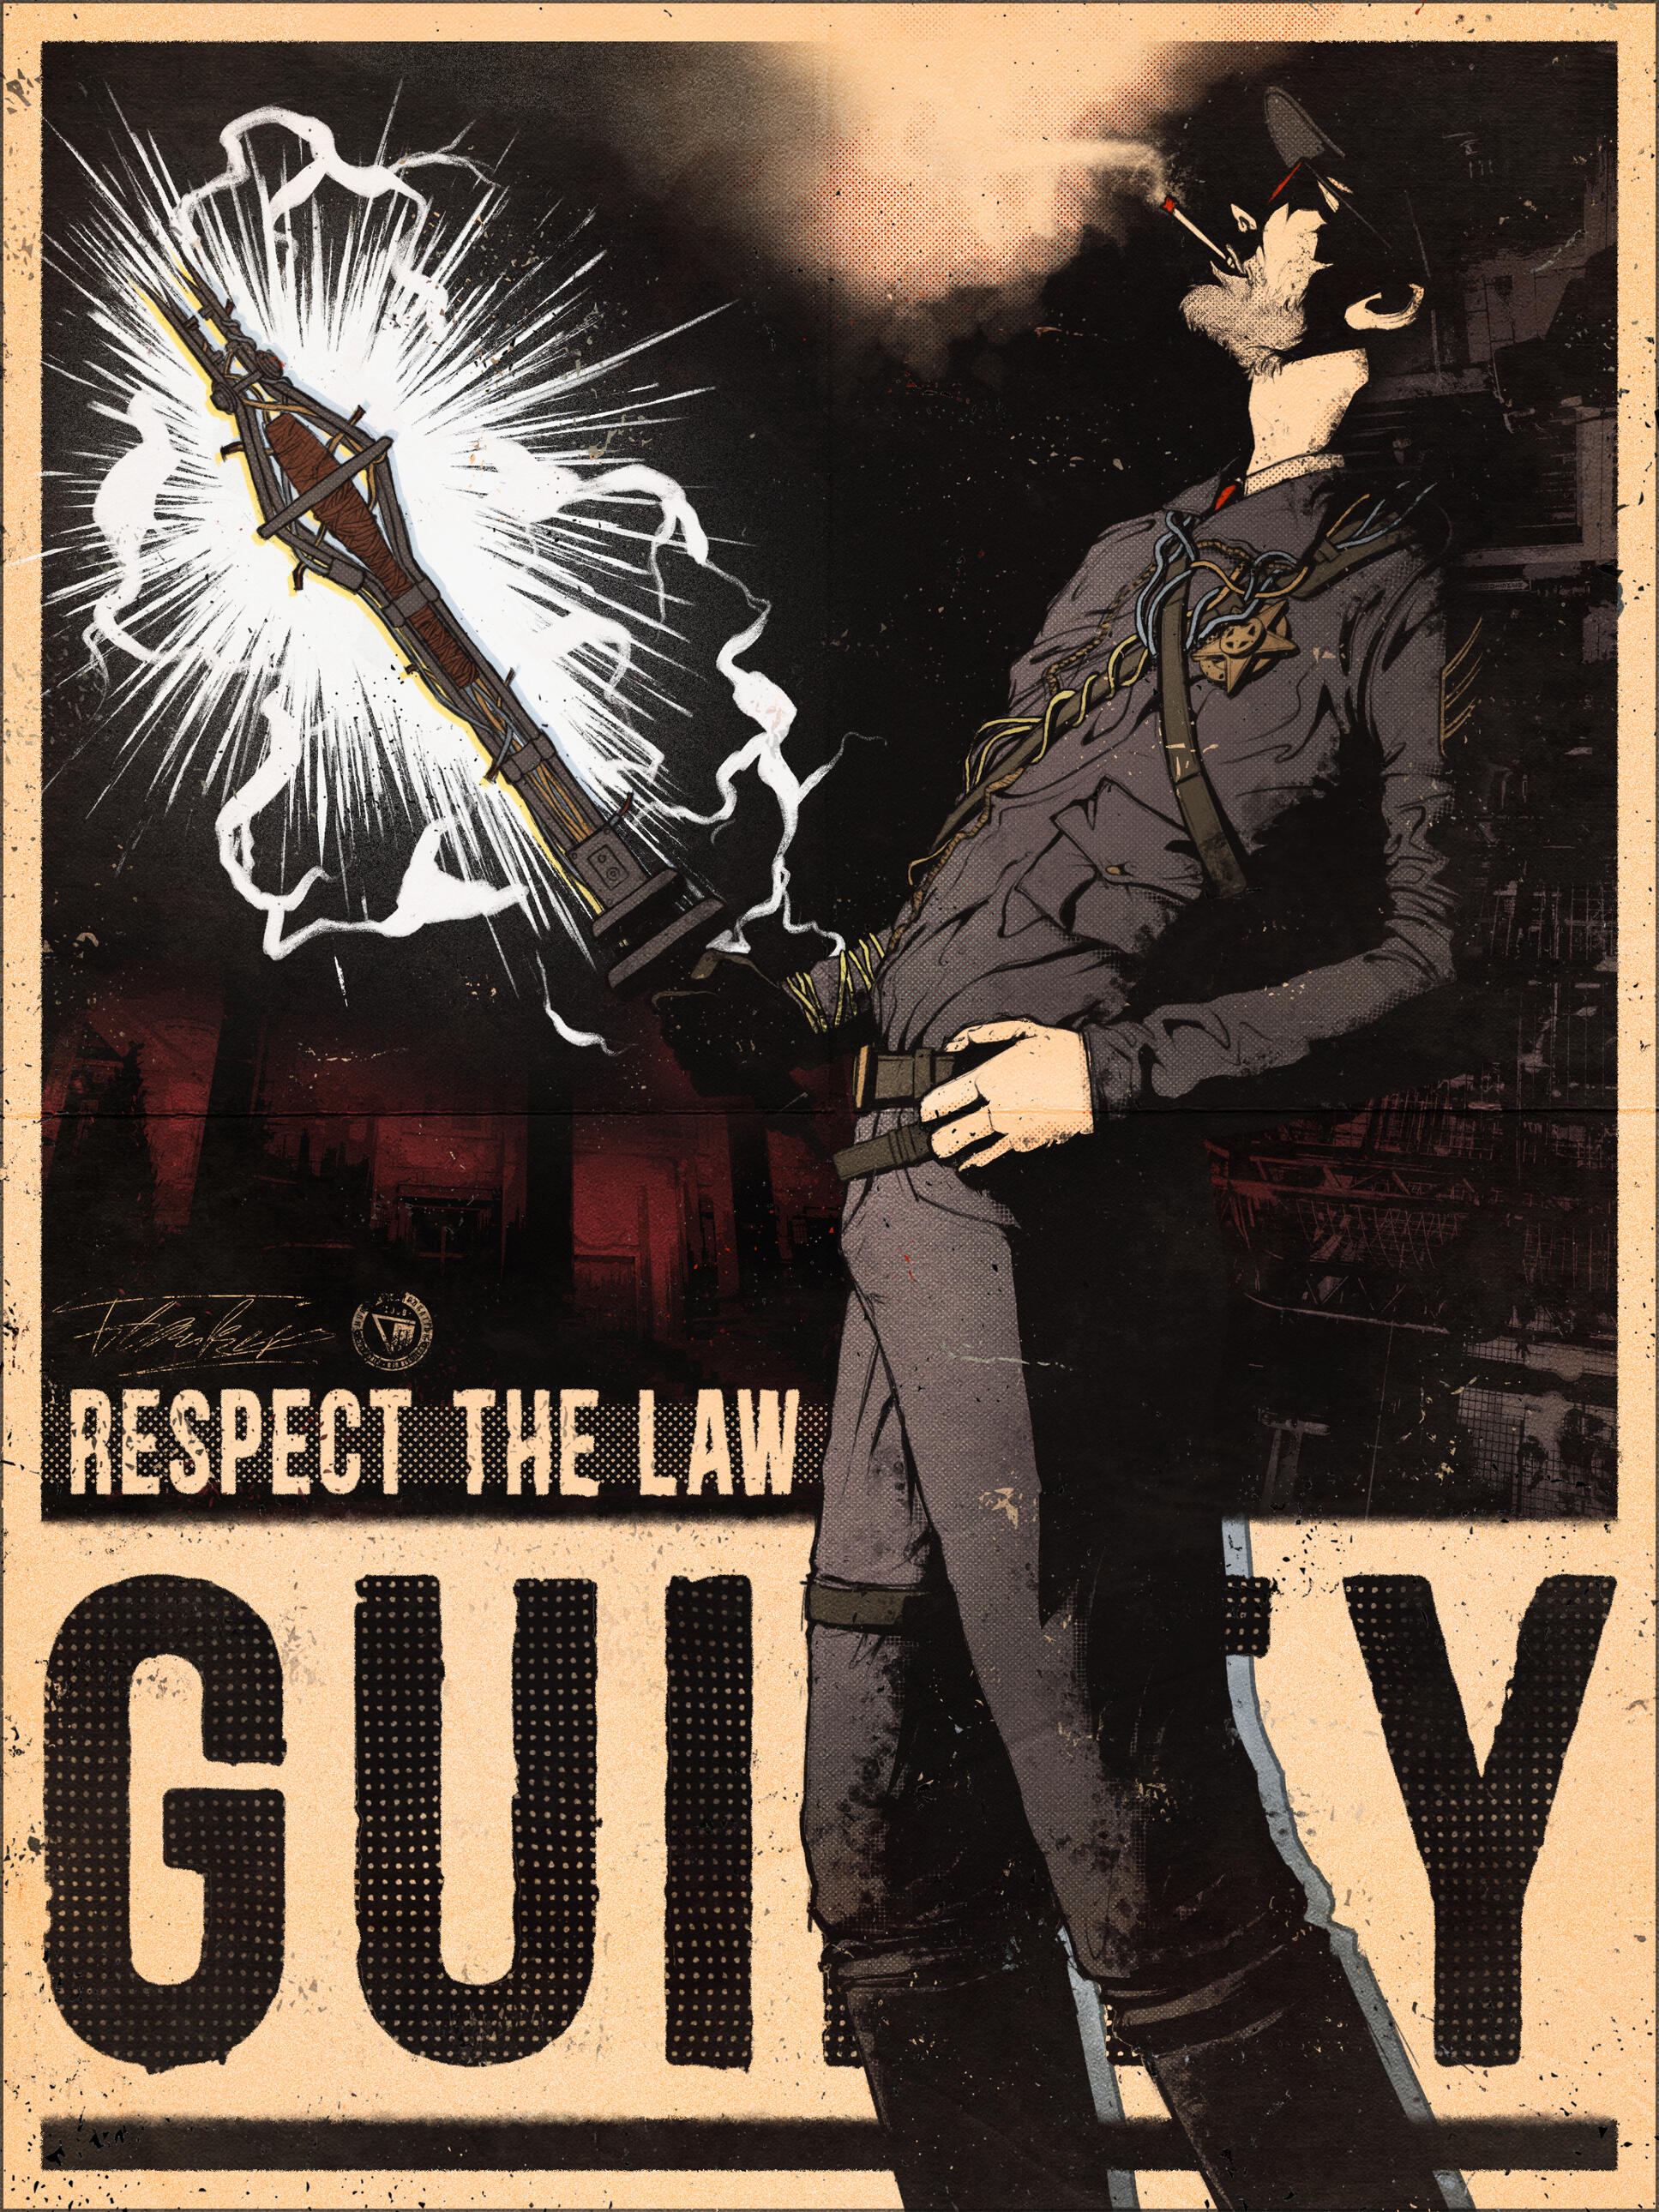
Here is the Progress of an artwork of a Poster displaying the character Sgt. Leland Coyle from the Game "The Outlast Trials".
I wanted to create a poster that matched the visual style of the posters found in-game while also highlighting Coyle's intimidating and unhinged personality.
The following images are examples of official posters from "The Outlast Trials":


The following image is a 3D render of Coyle:

To plan the composition, I photographed myself wearing a police hat and using a prop as a substitute for Coyle's shock baton. With this I created a rough layout for the poster.
I chose this pose because it felt fitting for Coyle's arrogant sense of authority. I intentionally posed the prop in a way that makes it feel like an extension of himself to emphasize his aggression-filled ego.

Next, I sketched Coyle directly over my photo reference. After cleaning up the sketch, it became the final lineart for the poster. From there, I added the heavy black shadows also found in the official posters, using the glow of the shock baton as the main light source to create a dramatic, threatening atmosphere.


Afterward, I colored the piece and used Photoshop's adjustment layers to tweak the colors until I was happy with the overall result. I then added the lightning effects from the baton and the smoke from his cigarette and roughened up the edges of the black shadows in order to give the poster a harsher appearance, along with some subtle gradients.


I added a dotted halftome texture commonly seen on posters and in comic books to further enhance the quality of the poster. I also enhanced his smoke and blended it into the bright border of the poster. Addionally, I added a blue-toned duplicate of his silhouette behind his legs like in on of the official posters seen below.


I tweaked the smoke a bit more and added subtle lighting to the shock baton.
Finally, I added the typography. I chose the phrases "guilty" and "respect the law" because they reflect Coyle's distorted sense of justice and law. I used the font "Blackside Rust Bold" which is also used in the official posters, then added wear to the edges of the text to give it a more aged look. I also incorporated halftone textures both inside and behind the text, while again using the police station poster as reference.


Then I added shots from the Police Station and Courthouse Trial Environments, as they are the ones where Coyle is the prime asset in. I first fully desaturated the images and applied a posterize filter to reduce the number of tonal values. Lastly, I incorporated them into the composition and adjusted their colors to match the color scheme of the poster.


In the final stage, I added the Murkoff logo along with paint splatters and scratches to make the poster feel even more aged and worn out. To finish the piece, I applied additional noise, fog and paper textures to make it seem like the poster is printed on actual paper. This concludes the progress of this artwork.


Feel free to also check out the progress of my artwork: Viago the Imperial Agent

Artwork Progress: ORiginal character "Viago"

Here is the Progress of an artwork of my Star Wars: The Old Republic Character, Viago the Imperial Agent.
When creating the sketch I used a mix of the Imperial Admiral Uniform and the italian Carabinieri Uniform to create his Outfit.


At first, I started to create some simple shadows, and then I went more and more detailed, creating shadows and highlights. For reference, I used different photos, edited them into grayscale and colorpicked the shades.


In the following, I will show a few closeup progress pictures from the face, the gloves and the boots.
When shading the face, I was very inspired by Arcane's artstyle, so I went ahead and used a shot of Marcus as reference. I created Viago's Burn Scar with additional layers set to "Multiply" and "Overlay".


The gloves were quite the challenge because they are made of leather, though not as shiny and slick as the boots, but still reflecting some light. It was an interesting texture to paint and I struggled for some time, especially because the gloves were black. It was interesting to try to keep the gloves dark but still add shadows while having a limited range of shades for the shadows.


The boots themselves were already almost pitch-black, so in stead of adding mainly shadows, I focused on their shininess and added some lighter tones at the edges. The light gray highlights made them really pop.


I decided to draw a background first, keeping the scenery simple whie still fitting that confident, dominant, almost villainous aura of Viago.

I colored him at the very end, with one Layer for each color used. After painting the layer on top with one simple color, I changed the layer mode to "Color", which adapts the greyscale to the color. I gave his face some purple blush and his eyes a glow, fixed some little details and it is done!

Feel free to also check out the progress of my artwork: Outlast Trials Poster
